
This guide walks you through the core workflow in Trucking Hub TMS: creating a driver, adding a truck, dispatching a load and automatically generating an invoice. Let's get started.
Add a Driver
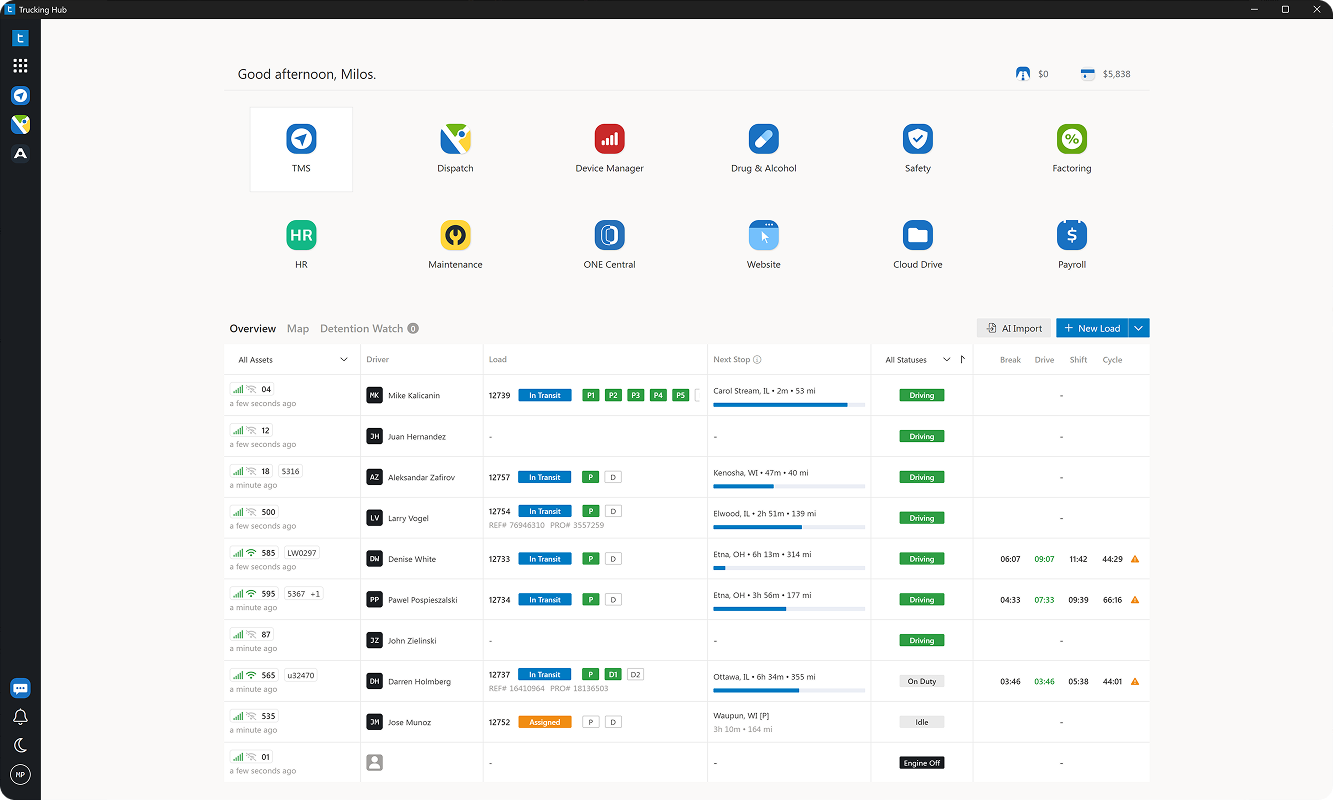
Navigate to TMS → Drivers, then click + New Driver in the upper-right corner. Complete the required fields below:

Driver ID
A unique identifier for the driver. This can be an employee number, payroll ID or any internal reference.
First Name & Last Name
Enter the driver's legal first and last name.
Driver Type
Select Company Driver for employees or Owner Operator for independent contractors.
Pay To
Choose whether settlements are paid directly to the driver or to the company.
Compensation Type
Select how the driver is paid (load percent, carrier mileage, hourly or per load).
Rate
Enter the driver's pay rate based on the selected compensation type.
Empty Rate
(Optional) Specify a different rate for empty miles, if applicable.
Extra Stop Compensation Type
Choose how additional stop pay should be calculated (flat, hourly or per mile).
Default Load Accessorial Percentage
(Optional) Set the driver's default percentage for load accessorial charges.
Valid From / Valid To
Set the period during which the compensation rate applies. These dates preserve the driver’s pay history, allowing you to add future pay increases without overwriting previous rates. Leave Valid To blank if the current rate has no scheduled end date.
Click Create to add the driver to your fleet.
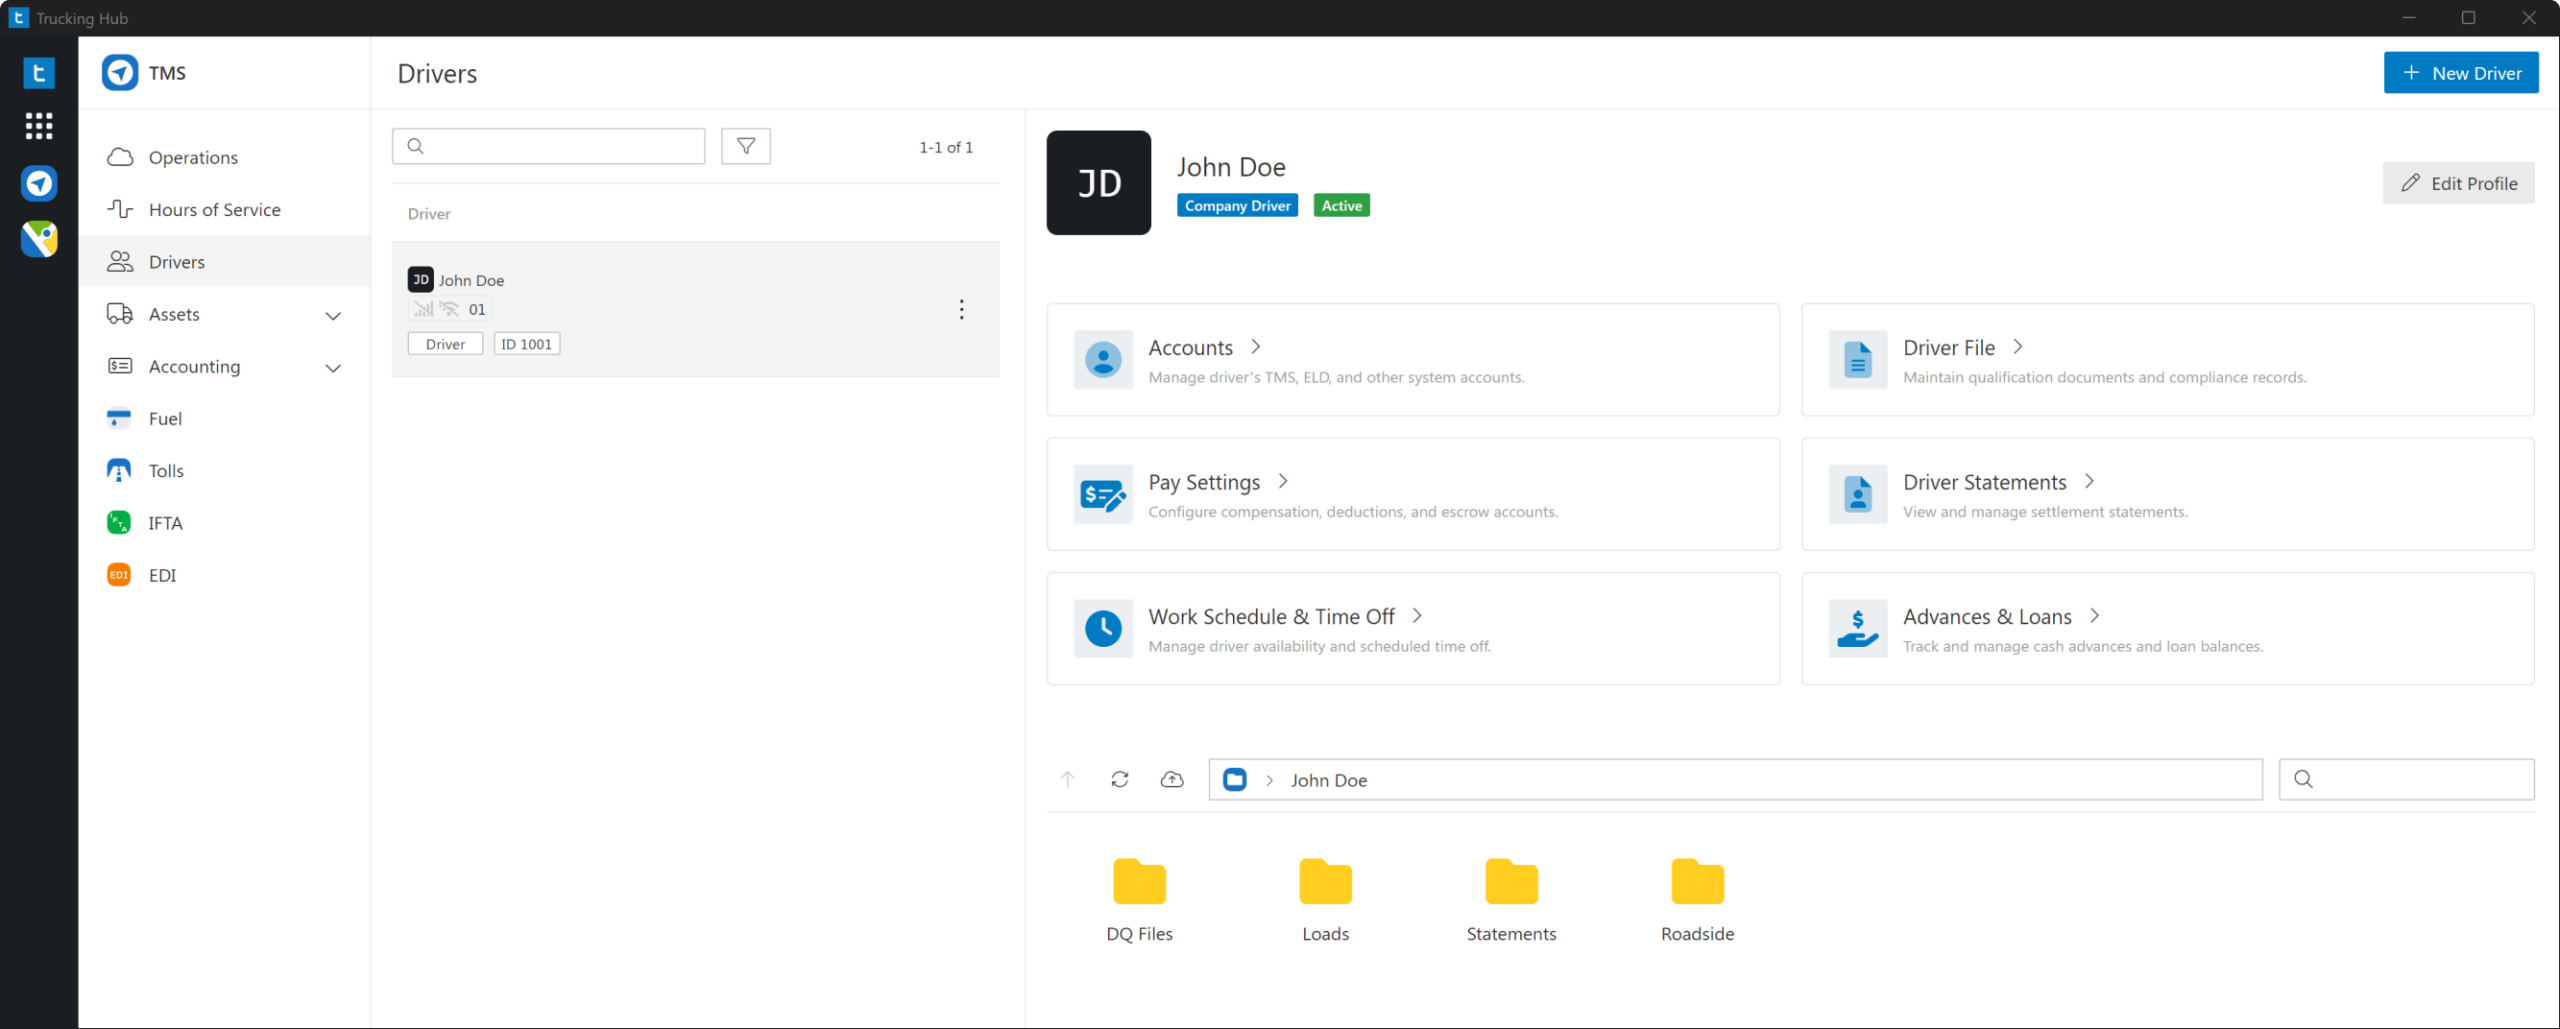
Once your driver has been created, you'll have access to their complete profile where you can manage driver qualification files (DQF), compensation, settlements, schedules, connected accounts and other operational details.
Add a Truck
Navigate to TMS → Assets → Trucks, then click + New Truck in the upper-right corner. Complete the required fields below:

Truck Number
Enter the unit number used to identify the truck.
Color
(Optional) Enter the truck’s color.
Sticky Note
(Optional) Add any internal notes about the truck.
VIN
Enter the VIN, then click VIN Decode to automatically fill in available vehicle details.
License Plate Number & State
Enter the plate number and issuing state. A temporary placeholder can be used, but an accurate plate is required to sync with PrePass, BestPass and Samsara.
Click Save to add the truck to your fleet.

Now that the truck has been added, click on + Assign Driver to assign the driver you created earlier so the truck is ready for dispatch.
From the truck profile, you can manage driver and fleet assignments, attach trailers, connect devices, view GPS logs, track maintenance and upload required documents. Adding expiration dates to documents allows Trucking Hub to track renewals and notify your team before they expire.
Create a Load
Loads can be entered manually, but the fastest way is to upload the broker’s rate confirmation using AI Upload. Trucking Hub automatically extracts the rate, stops, appointment details, reference numbers, equipment requirements and other load information in seconds.
Click AI Upload next to + New Load to select a rate confirmation from your computer, or simply drag and drop the file directly onto the AI Upload button from the Trucking Hub dashboard, TMS → Operations or supported screens within the Dispatch app.
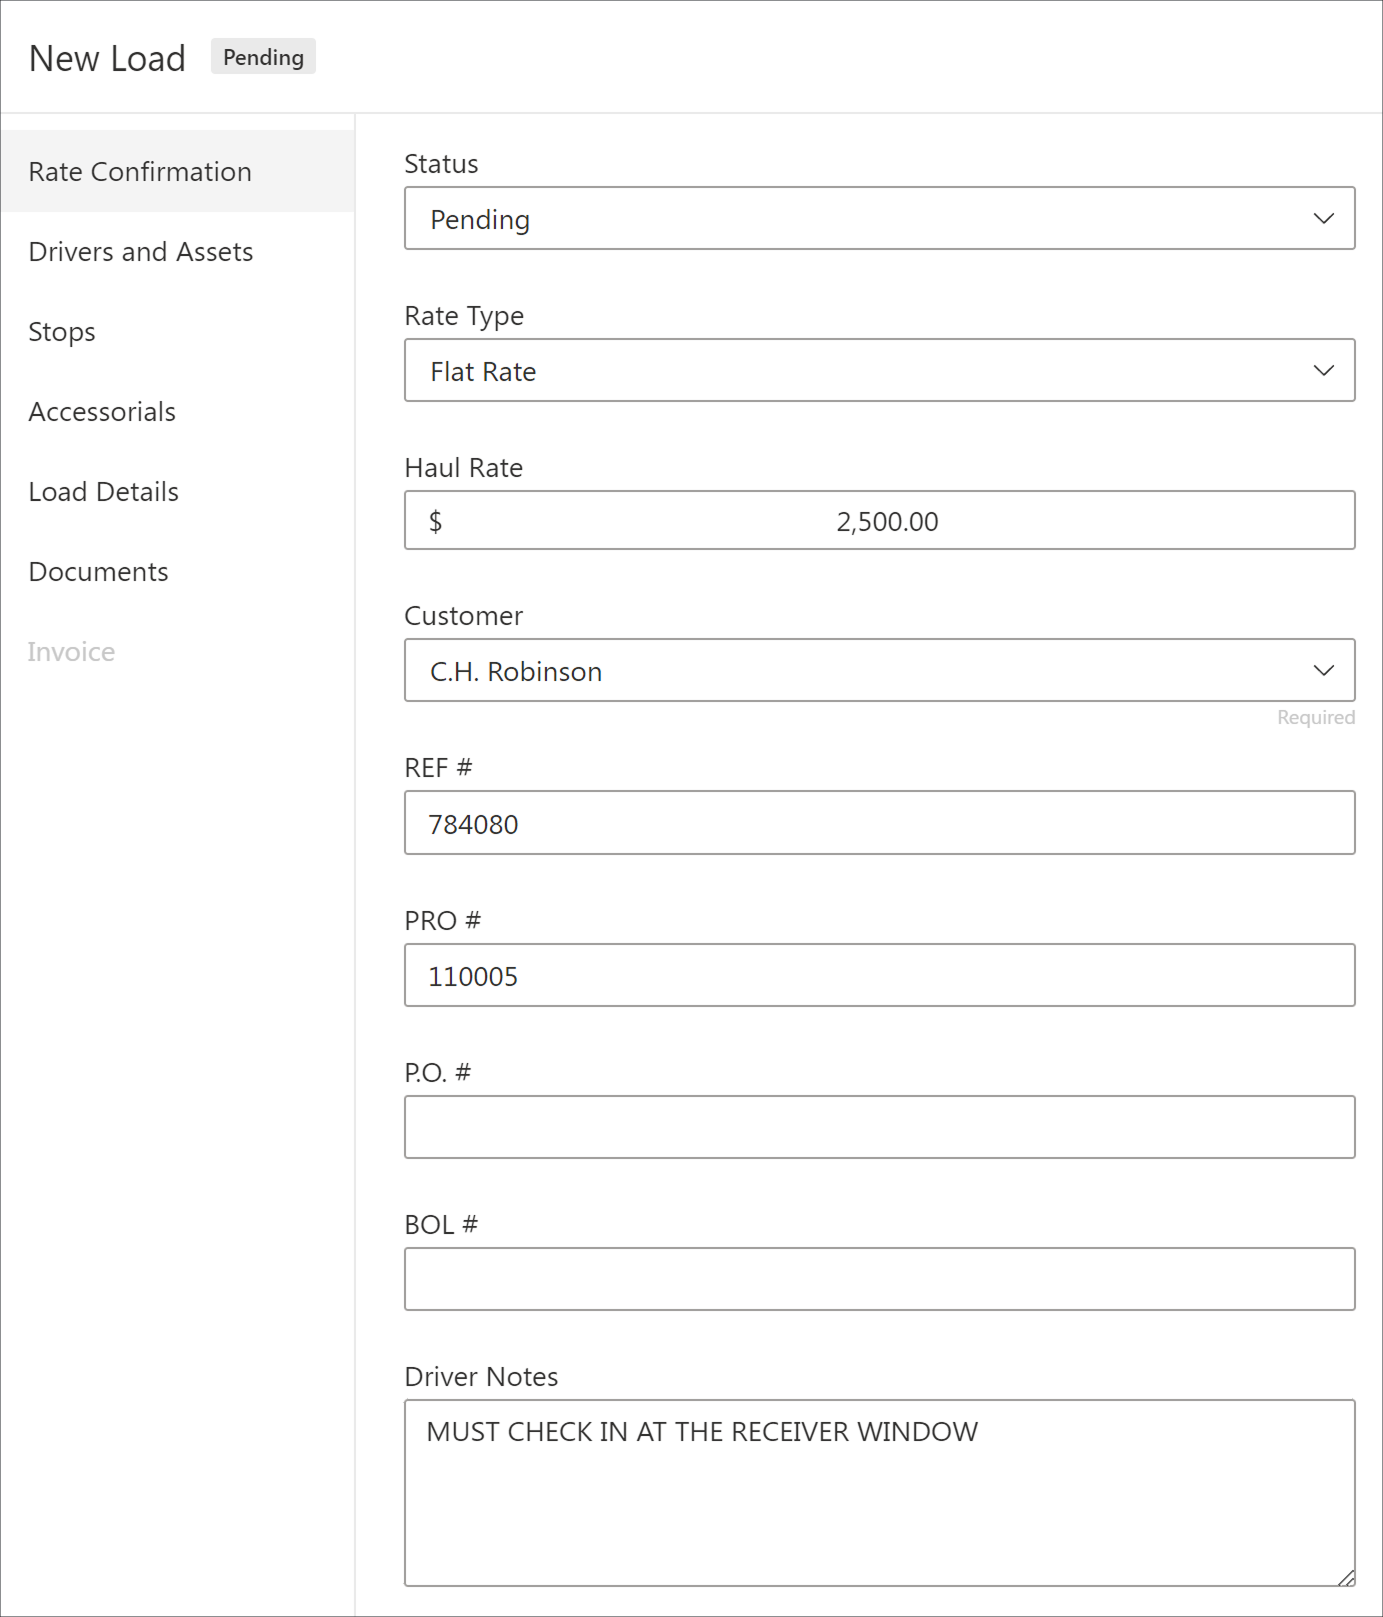
Rate Confirmation
Review the information extracted from the rate confirmation. The only required field is Customer, which determines who the invoice will be billed to. You can also review or update the rate, reference numbers and driver notes.
Drivers & Assets
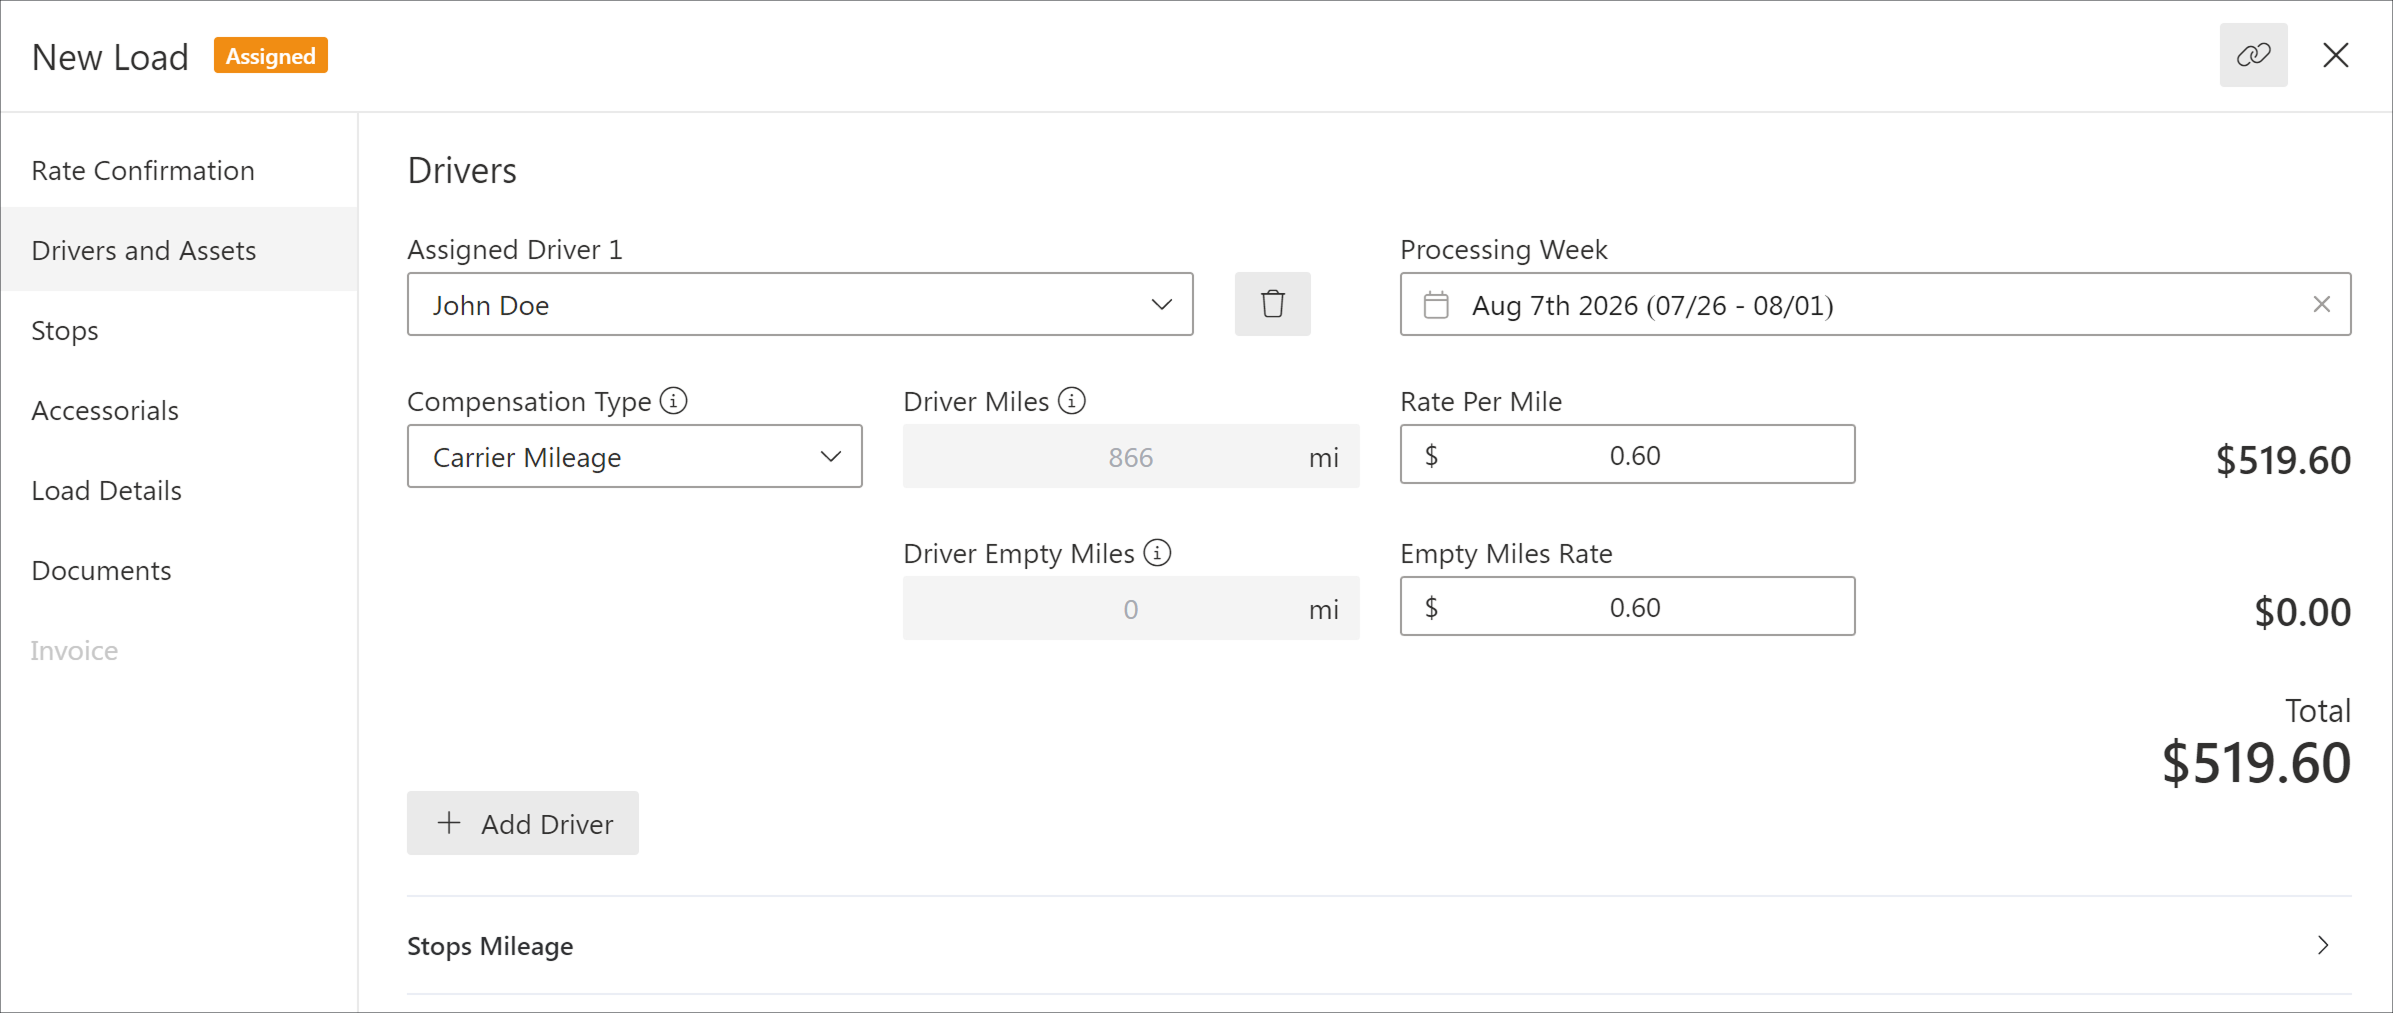
Select the driver for the load. Trucking Hub automatically calculates driver pay from the driver’s compensation profile and pre-fills the truck already assigned to that driver.
Stops
Review all pickup and delivery stops, including addresses, appointment dates, times and instructions. To include empty or deadhead miles, Edit the first stop and enter where the driver is starting from. Driver pay will recalculate automatically.

Accessorials
Add any additional charges associated with the load, such as detention, layover, lumper or extra-stop fees.
Load Details
Review additional shipment information, including equipment requirements, commodity details, weight and other load-specific information.
Documents
Upload or review documents connected to the load, including the rate confirmation, bills of lading and delivery documents.
Invoice
The invoice becomes available once the load is created. Invoice is not created for loads in Booked or Pending status.
Click Create to add the load.
The assigned driver will instantly receive a push notification in the Trucking Hub Mobile app. Drivers can view load details and notes, navigate to each stop with turn-by-turn navigation powered by CoPilot Truck Navigation, and upload proof of delivery, or other documents, directly from the app.

Invoicing
As soon as a load is created, Trucking Hub automatically generates the invoice. Customer information, rates, stops and reference numbers carry over from the load, while proof of delivery is attached automatically once driver uploads it.
That’s it. Invoice is complete and ready to send, add to a billing batch or submit for factoring. Factoring schedules can be synced with integrated factoring partners in a single click, creating a fast, fully connected load-to-invoice-to-funding workflow.
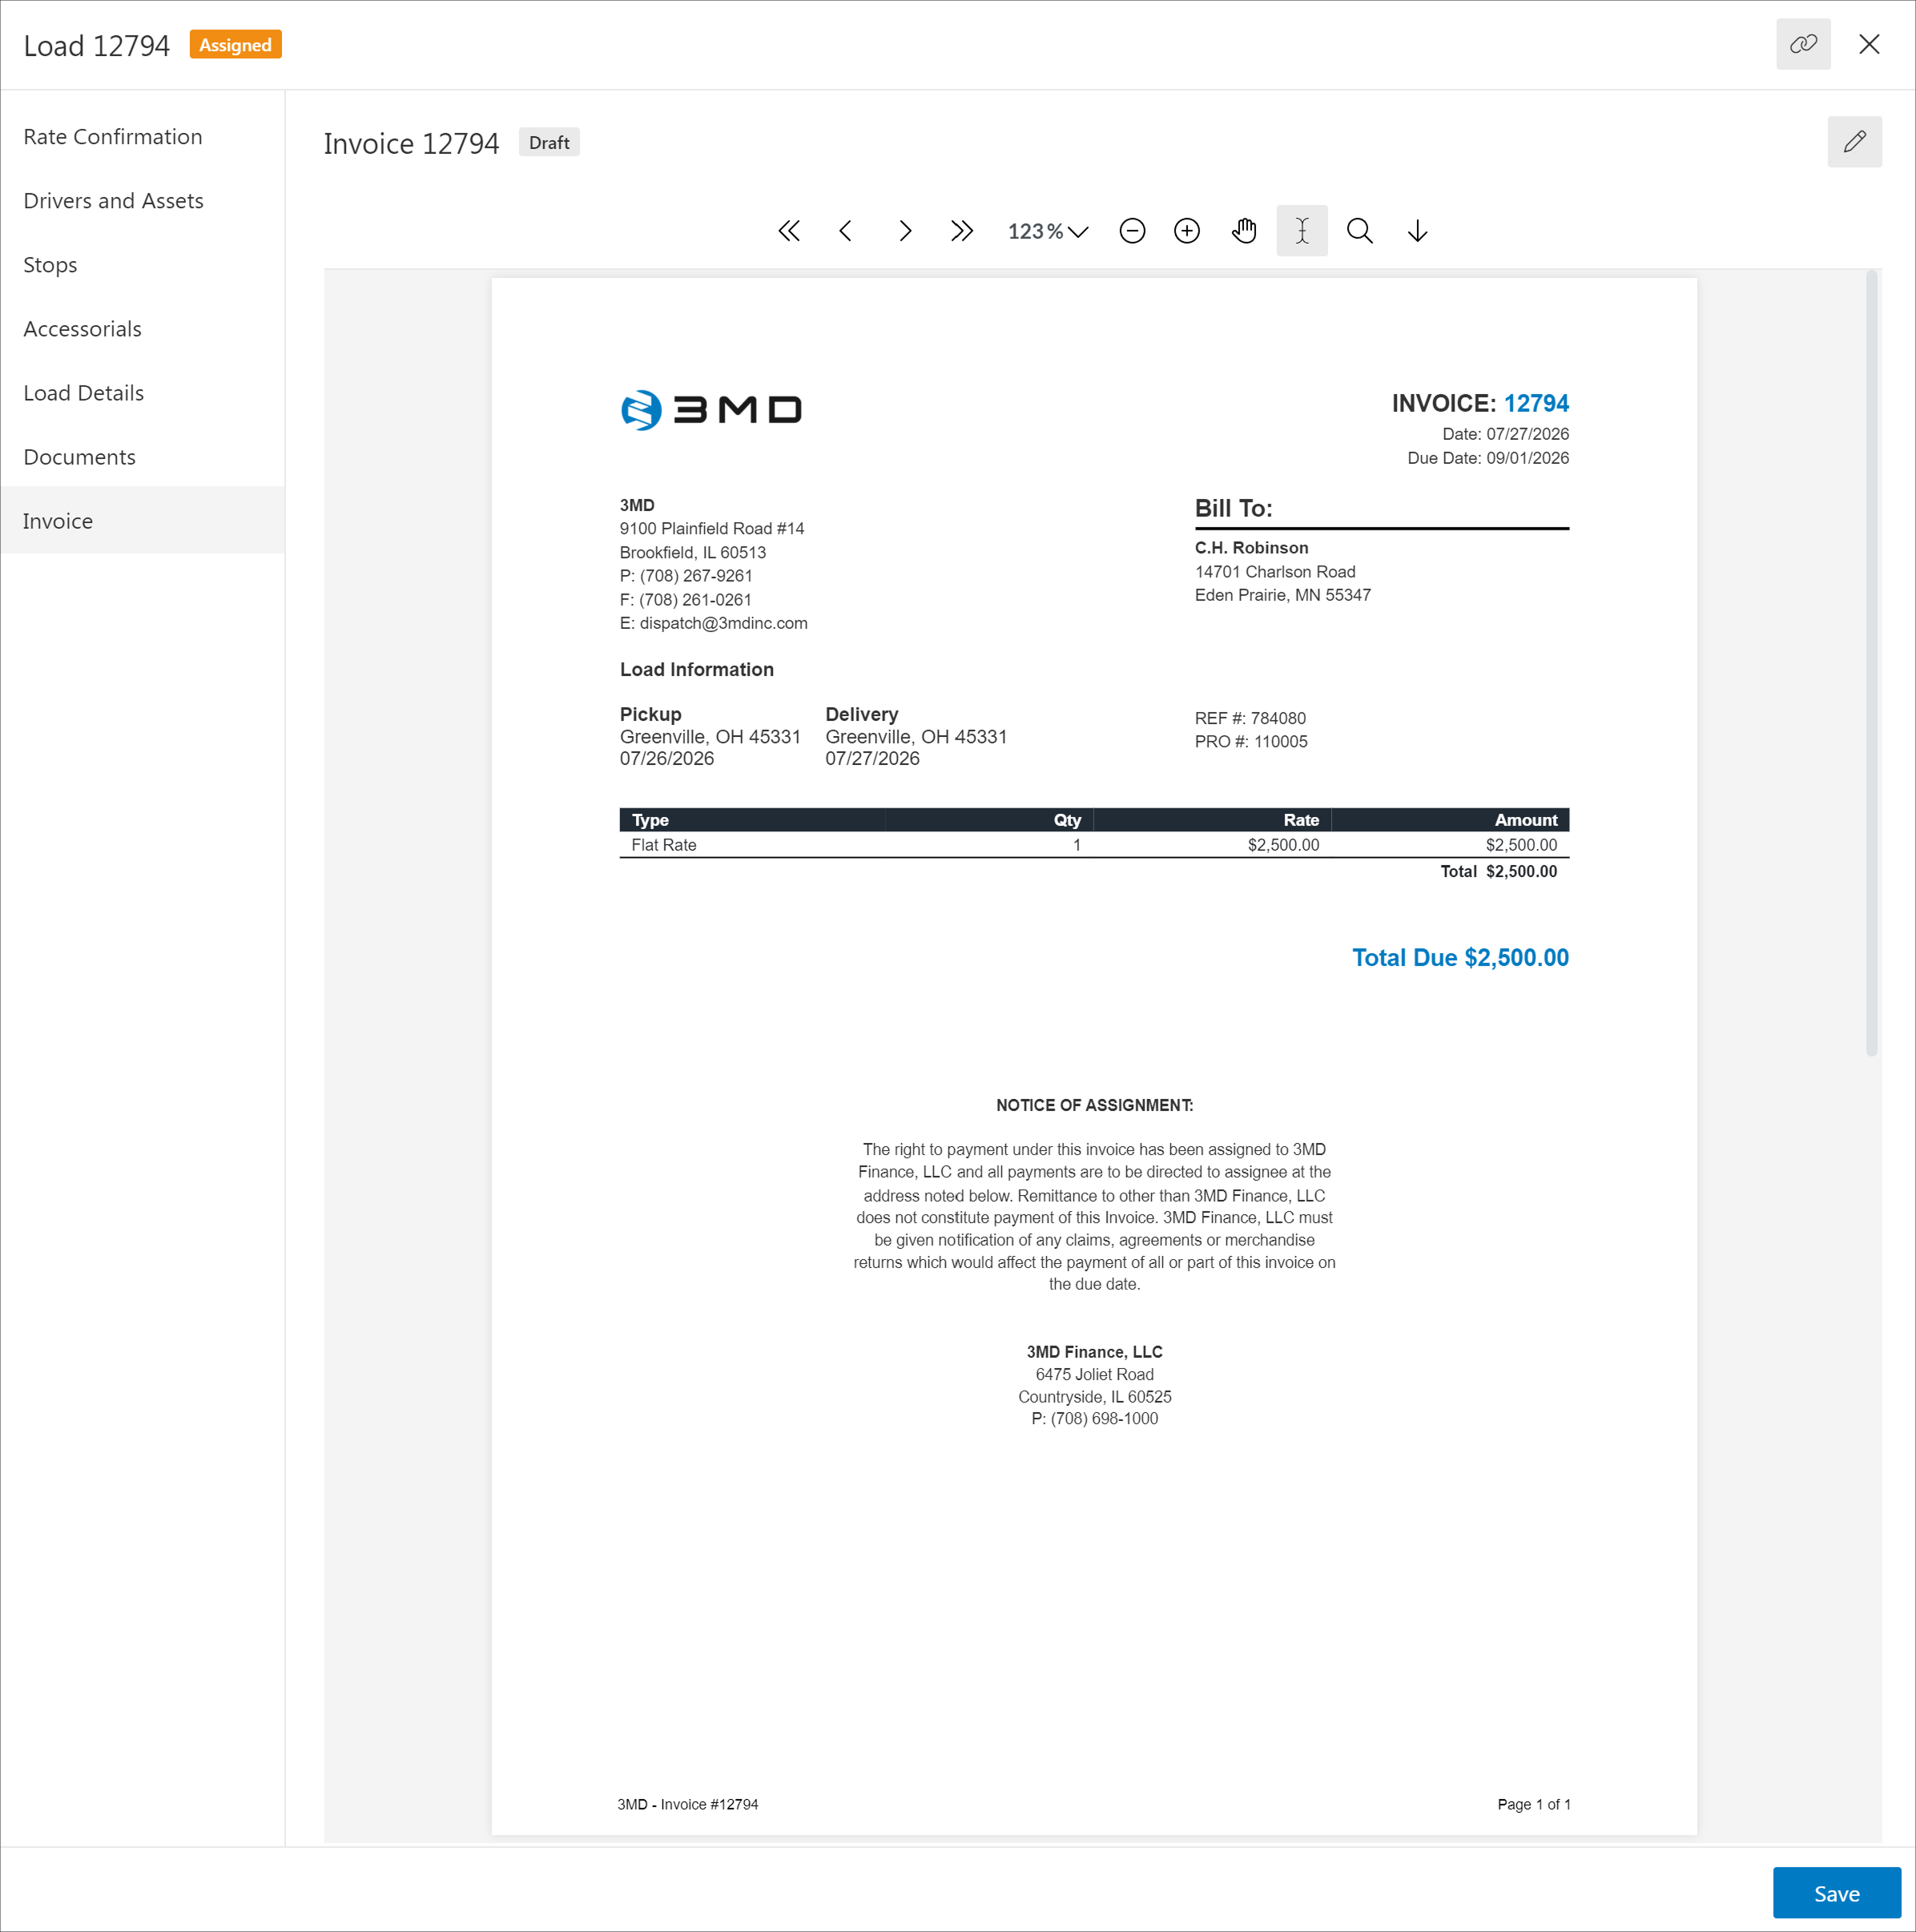
Tip: If you use a factoring company, navigate to Factoring → Settings to configure your factoring partner, customize the Notice of Assignment printed on invoices and set up default factoring contacts before sending your first invoice.
Company Profile
Navigate to Admin → Carrier Profile, upload your company logo and complete any missing information. Your logo and company details are automatically used on invoices and other customer-facing documents.